Showing posts with label 2013 Quilts. Show all posts

Sunday, January 14, 2018

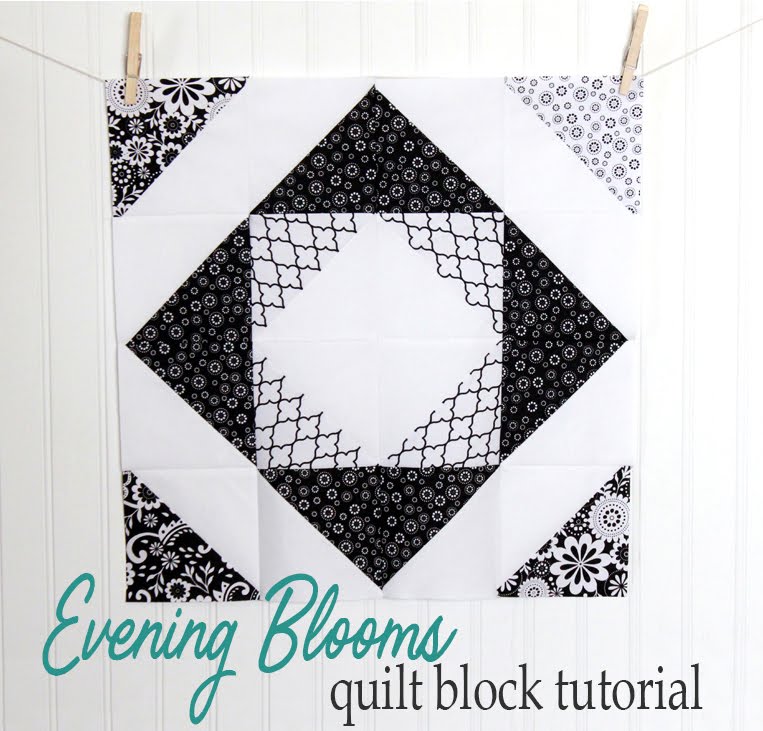
Second Look Sunday: Evening Blooms Quilt Tutorial

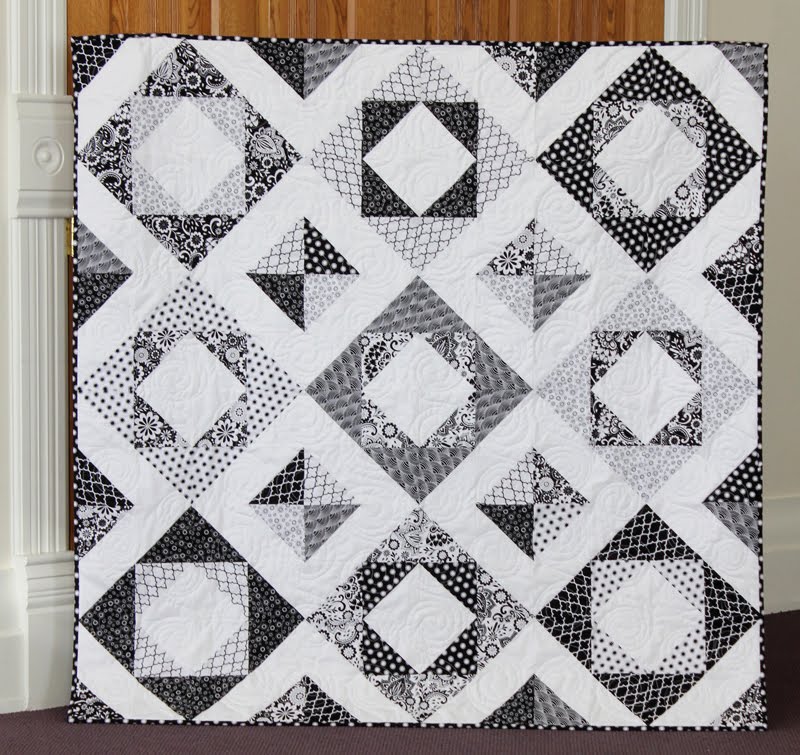
Happy Sunday everyone!  This year I'm starting a new feature on my blog called Second Look Sunday.  I've been blogging here for ten years now - TEN!  That's crazy!  And with so many of you being new readers, I wanted to highlight and share with you some quilts and tutorials you might have missed!  So the second Sunday of each month will be Second Look Sunday.  This month's second look pattern is called Evening Blooms.  


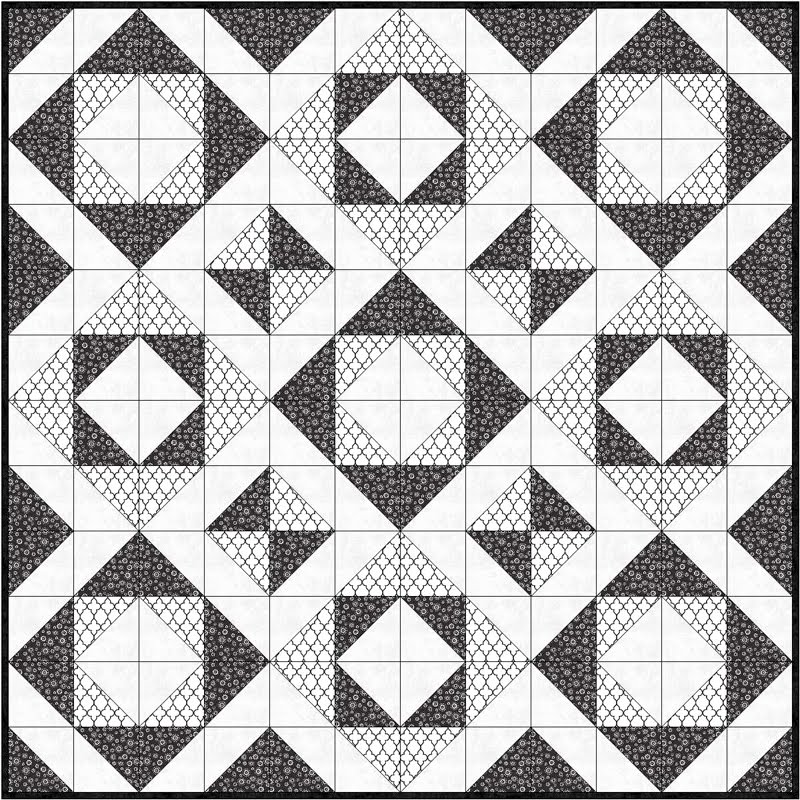
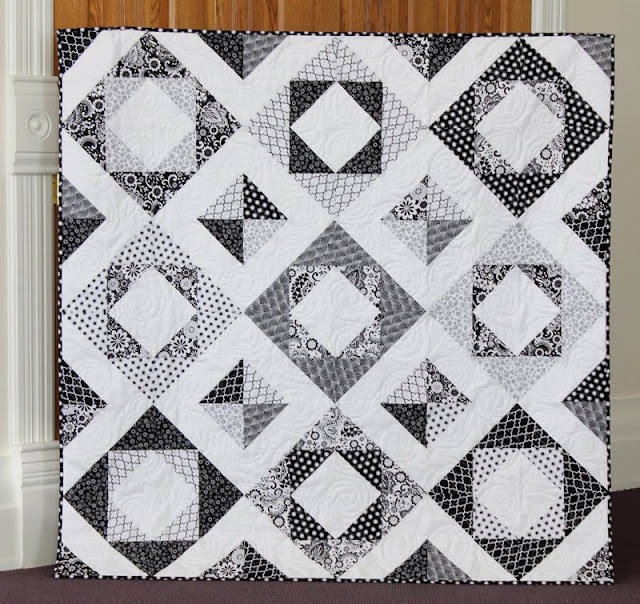
I designed this quilt in 2013 to go with a new line from Carina Gardner & Riley Blake.  The line was had some great florals and geometric prints but it was all in black and white.  

This was a fun challenge for me - I wanted to showcase the constrast between the prints, and focus on using the value of the fabrics (the lightness and darkness) to create a secondary design in the blocks.  

What do you think?  Can you see it?


The entire quilt is made from half square triangles, but in this tutorial I show you a quick and easy way to make a ton of HSTs.  

You can find the tutorial here, and if you'd rather have a handy printable PDF version of the pattern you can find it here.

If you make an Evening Blooms quilt I'd love to see it!  Tag me on Instagram (@abrightcorner) and use #eveningblooms and #abrightcorner.  Or tag me on Facebook too!


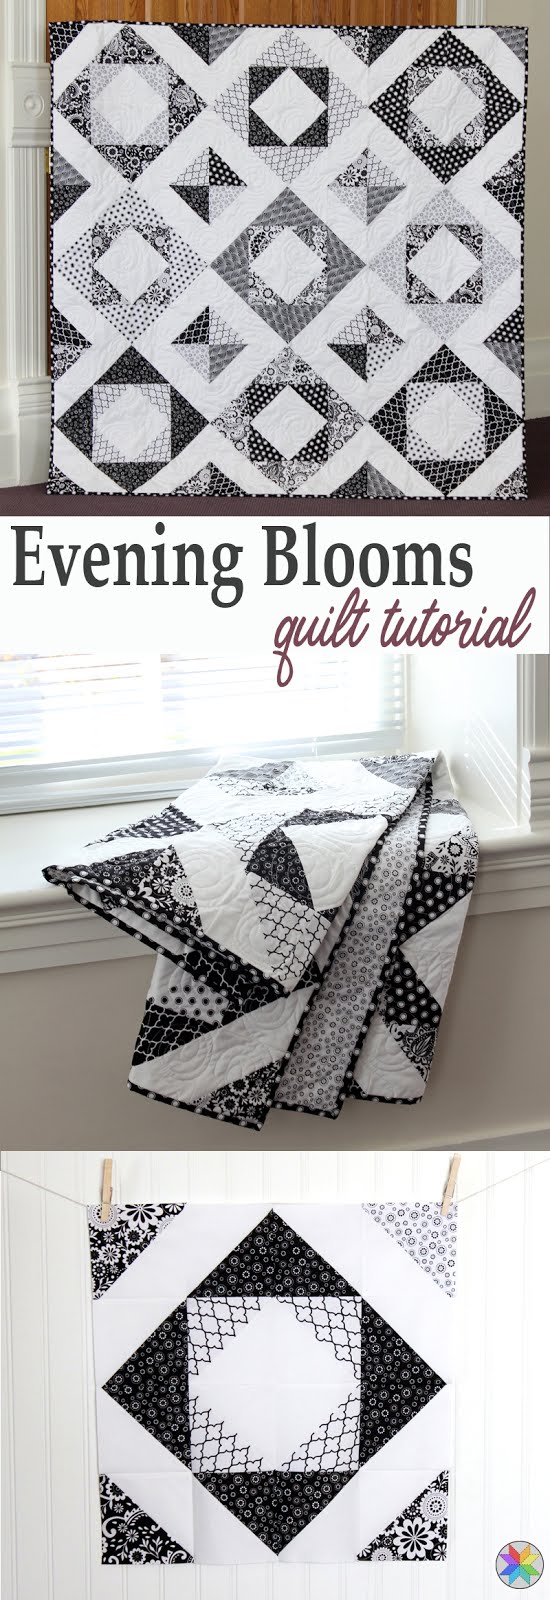
Evening Blooms quilt tutorial by Andy Knowlton of A Bright Corner - she shares a great trick for making a ton of HSTs at a time!


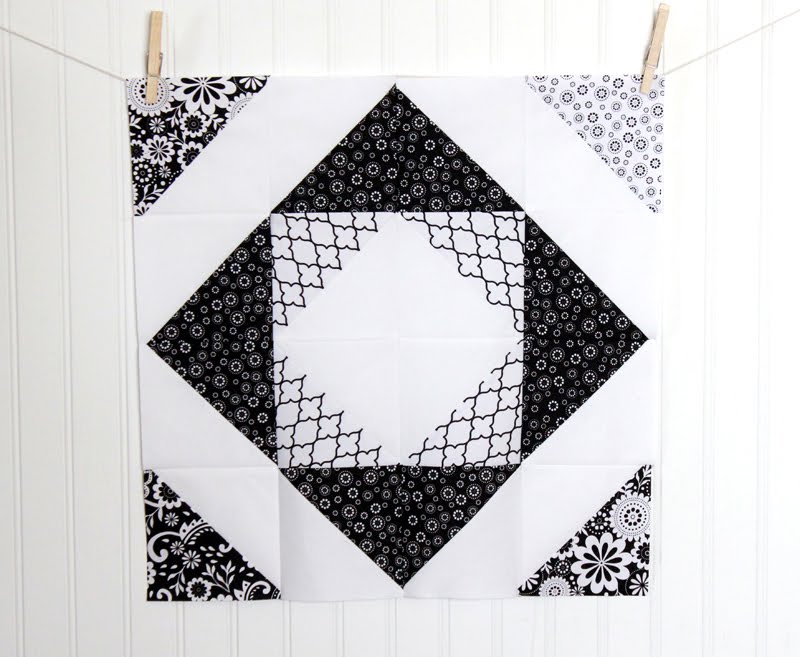
Evening Blooms block tutorial by Andy Knowlton of A Bright Corner - she shares a great trick for making a ton of HSTs at a time!

Monday, March 10, 2014

Equilaterals

I have (strangely enough) pretty clear memories of my first geometry lessons waaaay back in 5th grade.  I remember my teacher using an overhead projector and teaching us all about angles.  Acute.  Obtuse.  Right.  Then we learned about triangles.  Isosceles.  Scalene.  And my favorite – equilateral.  There’s just something so NICE about an equilateral triangle.

equilateral triangle quilt by A Bright Corner

I started this quilt last fall at The Sewing Summit.  I worked on it very slowly over the next couple of months.  It just wasn’t my favorite thing to work on.  It started to feel like the never-ending quilt.  You know that type of quilt, right? 

minky backed quilt

Finally I finished the top, quilted it and then all it needed was binding.  I took it with me to Quilt Bliss in January and finished the binding there.  My motivation for finishing it was so that I could use it while I was way up there in the lovely, snowy mountains of Utah.  Worked like a charm- I finished it up the very first evening!

I had backed it with some gray minky and it has now become everyone’s favorite TV watching quilt.  That’s bittersweet, right?  I’m glad everyone loves it, but then I never get to use it.  Ever.  I even tried calling it “my quilt” but they’re not buying it.   


Friday, November 22, 2013

Evening Blooms quilt and tutorial

Evening Blooms quilt tutorial from A Bright Corner

Happy Friday everyone!  Today I have a quilt tutorial to share with you!

Evening Blooms quilt tutorial from A Bright Corner

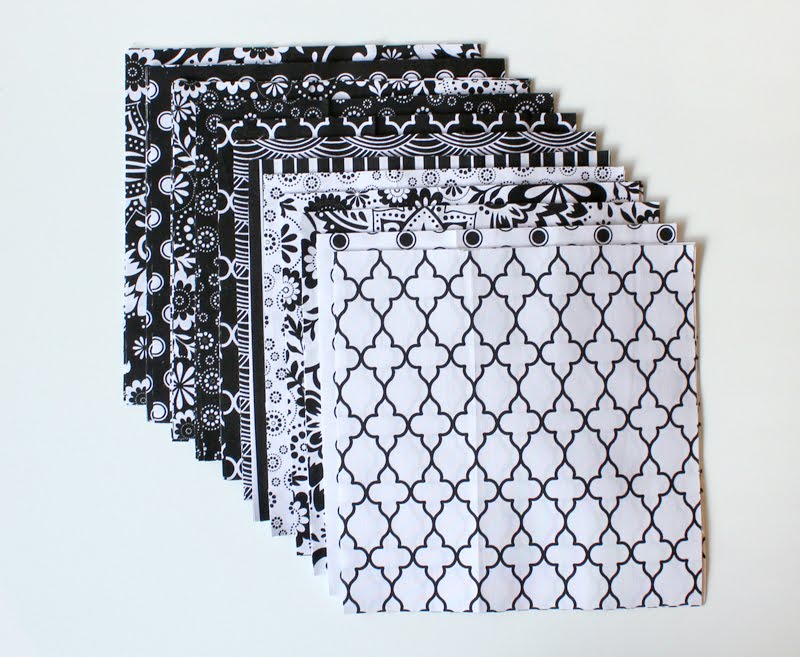
I made this quilt using just the black and white prints from Carina Gardner's Evening Blooms fabric line.  I love the bold florals in Evening Blooms and when mixed with the geometric prints it’s the perfect combination.  It was so fun to design a quilt that focuses mainly on the value of a fabric (lightness / darkness).  This pattern works well with prints that have a high contrast to one another, and there’s just something so classic about black and white!

Evening Blooms quilt tutorial from A Bright Corner


This quilt is made entirely from half square triangles (HSTs) but don't let that deter you!  I have a fast and easy way to make a ton of HSTs in no time at all.    If you'd prefer a handy printable version of this tutorial you can find it here (for personal use only please!)   Let's get started!


Here's what you'll need for this quilt:
1/4 yard each of 7 various dark prints (you can use 5, but 7 gives you more variety)
1/4 yard each of 5 various light prints (you can use 3, but 5 gives you more variety)
2 yards of white / background fabric
1/2 yard binding
3-1/2 yards backing fabric

Evening Blooms quilt tutorial from A Bright Corner

From each of the prints (7 dark and 5 light) cut 3 squares that measure 8".  You'll need 36 total.

From the white / background fabric cut 8 strips that are 8" x width of fabric. Subcut those strips into 36 (8") squares

Evening Blooms quilt tutorial from A Bright Corner

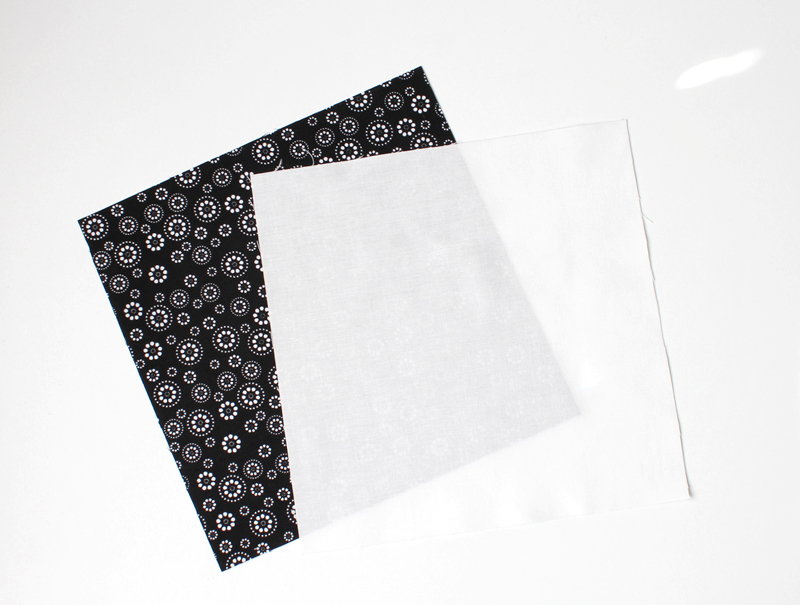
To create your half square triangles, pair up each print square with one white square.  Match edges, keeping right sides together.

Evening Blooms quilt tutorial from A Bright Corner

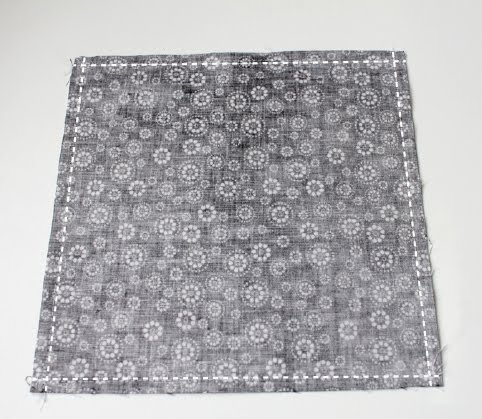
Sew around all four outer edges using a consistent 1/4" seam.

Evening Blooms quilt tutorial from A Bright Corner

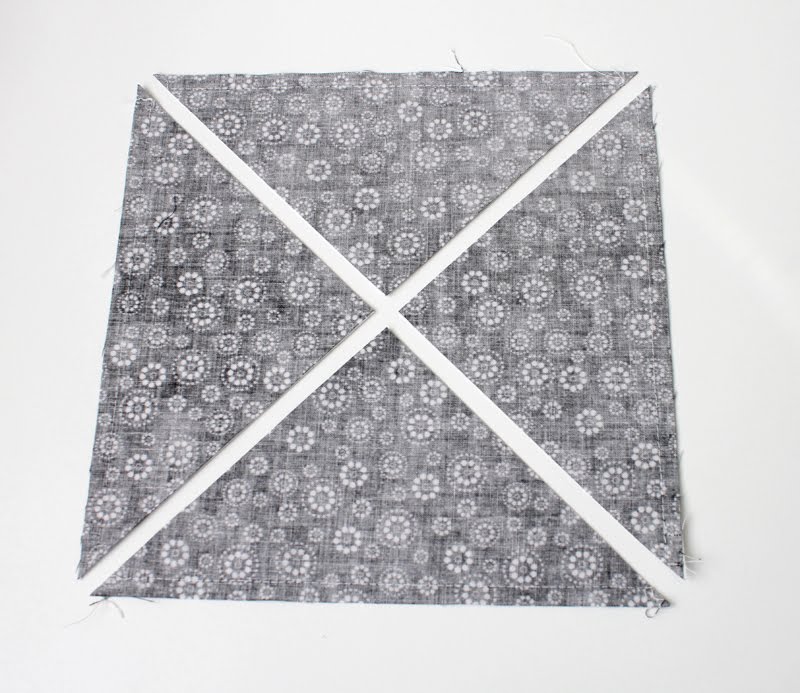
Using your rotary cutter, cut diagonally through each block twice as shown in the photo.


Evening Blooms quilt tutorial from A Bright Corner 

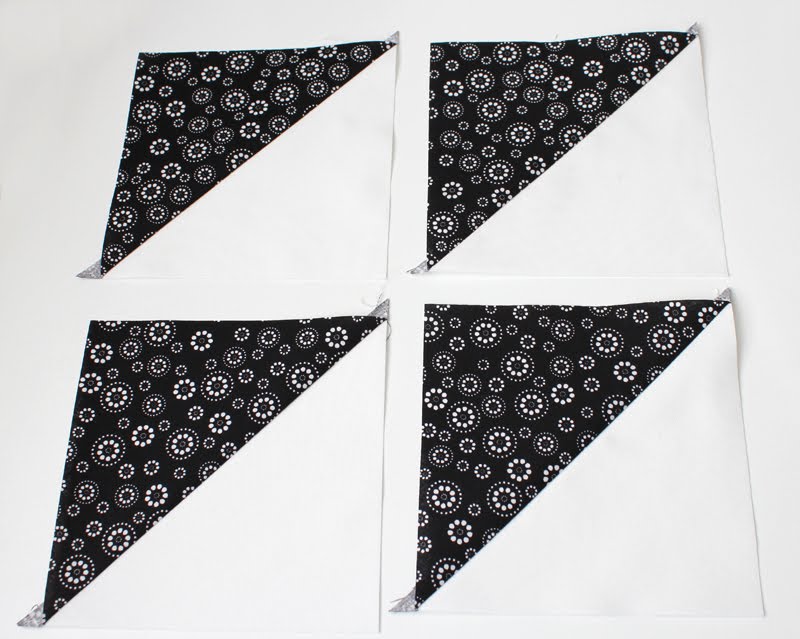
Being careful not to stretch it, press each HST.  I prefer to press the seam allowance toward the print.  Trim the little tails off of each HST.

If you are consistent with your seam allowances and careful to not stretch the HSTs you should not need to square them up.  If you find your HSTs to be varying in size, then square them each up to the same size (either 5.25" or 5" each).

Create all of your HSTs and then move on to the block layout.

Evening Blooms quilt tutorial from A Bright Corner


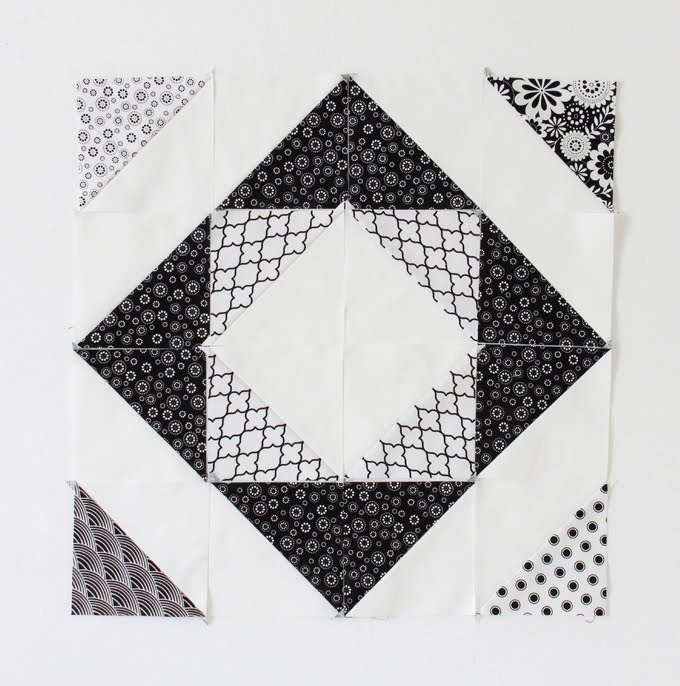
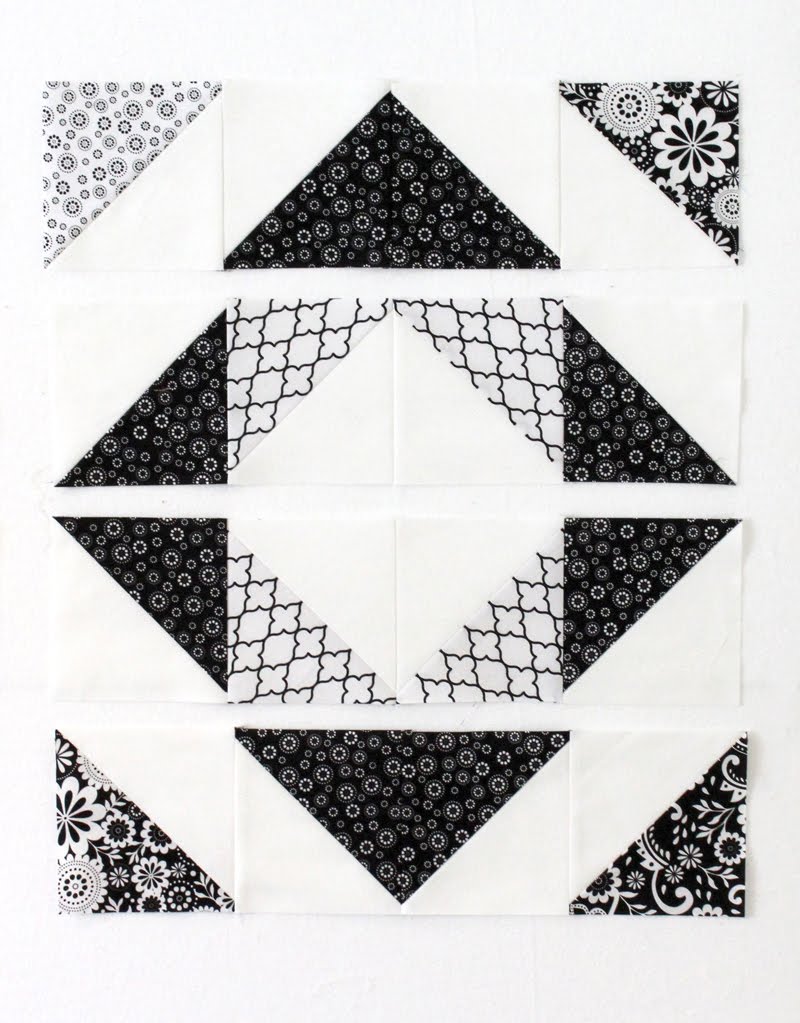
Layout all of the HSTs you need for one block.  Notice in the quilt layout diagram at the end of the tutorial that not all blocks are the same.  The dark and light prints are alternated for the main part of each block and the corner HSTs are different depending on where in the quilt the block will be located.

Evening Blooms quilt tutorial from A Bright Corner

Sew HSTs together into rows using a 1/4" seam.  Then sew rows together, matching seams.  Press your block.


Half square triangle quilt block tutorial - and see what a whole quilt would look like!

Your block is done!   Now use the layout diagram to make the next 8 blocks.


In the layout diagram I used just two prints - one dark and one light so you can clearly see the placement of each HST.   This quilt will measure about 57" x 57".


Evening Blooms quilt tutorial by Andy Knowlton from A Bright Corner


You can find a handy printable version of the tutorial here.  And if you make an Evening Blooms quilt I'd love to see it!  Tag me on Instagram (@abrightcorner) and use  #eveningbloomsquilt and #abrightcorner


Want to see more tutorials from A Bright Corner?  Check these out!  Click on the photo to view tutorial.


Monday, November 4, 2013

Quartet – a new pattern

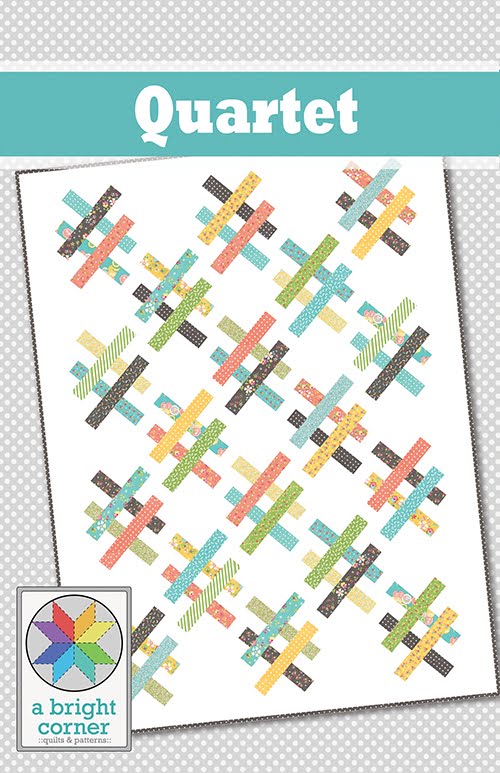
Happy Monday everyone!  I’m excited to be sharing a new pattern with you today called Quartet.
 
Quartet quilt pattern by Andy of A Bright Corner - a jelly roll quilt pattern with four sizes.  Perfect for using pre-cut strips.

Quartet came about through a misperception.  (Is that a word?)

Quartet quilt pattern by Andy of A Bright Corner - a jelly roll quilt pattern with four sizes.  Perfect for using pre-cut strips.


One afternoon I was quickly scrolling through my blog reader and caught a brief flash of a quilt as it scrolled by.  At that moment I thought, “cool quilt!” but when I went back to look at it, it wasn’t at all what I thought.  Before the original image left my brain (which happens kinda quickly sometimes) I scratched out a quick diagram of what I had thought I saw. 

I later did all the math and realized this would a perfect quilt for using jelly roll strips (2.5" precut strips)

Quartet quilt pattern by Andy of A Bright Corner - a jelly roll quilt pattern with four sizes.  Perfect for using pre-cut strips.

The pattern includes instructions for four quilt sizes:  baby, throw, twin, and queen. 

Quartet quilt pattern by Andy of A Bright Corner - a jelly roll quilt pattern with four sizes.  Perfect for using pre-cut strips.

The pattern can be purchased here in my shop as either a paper or PDF version, or here on Etsy (PDF only available on Etsy).  

The quilt shown in the photos above was made with a Scrumptious jelly roll (by Bonnie & Camille for Moda Fabrics) and the background fabric is Kona Snow.


Looking for more Jelly Roll friendly patterns?  You might also like these-
(click photo for more information)


Tuesday, October 22, 2013

Jack’s Blocks: take 4

 I don’t think I’ll ever tire of making quilts from my Jack’s Blocks pattern.  This one is the fourth I’ve made and it’s also my favorite.  Of course, the most recently made quilt is always my favorite!

Jack's Blocks quilt from A Bright Corner (pattern available!)

Photographing quilts is one of my biggest challenges.  Just the size of the quilts can be problematic.  This one wasn’t so bad because I didn’t have to stand on a chair to hold it up and the width was about as far as my arms could stretch. 

Then lighting can be tricky as well as the environment.  Windy days are my nemesis.  I decided to photograph this quilt indoors to keep things simple. 

 
Jack's Blocks quilt from A Bright Corner (pattern available!)

My living room gets pretty decent afternoon light, but I do have to move a few things around to make room.  For instance, there’s a blue bookshelf that normally sits right where this chair is.  It’s easy to slide around though – so I do.  All. the. time.  

In the photo below I just had to crop out all of the stuff that would be distracting – like the vacuum cord layin' around on the left and the big pile of shoes on the right. 

Jack's Blocks quilt from A Bright Corner (pattern available!)

For a quilt like this I would normally spend about 20 minutes taking photos – that is if I have to hold it myself.  It’s a lot faster (and a lot less work!) if I have a helper.  I took 36 photos, and from that batch I got thirteen that I was happy with.

Jack's Blocks quilt from A Bright Corner (pattern available!)

This quilt is now visiting my local quilt shop where he’ll be a display quilt for a few months.  The Jack’s Blocks pattern can be found here, here and here. 

If you make one (or have already made one) I’d love to see it!  You can email me a link to your blog, tag me in Instagram or if you’re on flickr then add your pics to my Sewing With A Bright Corner group. 

Thanks for stopping by!

Linking up to Quilt Story’s Fabric Tuesday!

Friday, October 11, 2013

Pow Wow quilt + Florence

I don’t often do what I call selfish sewing.  That’s the name I give to projects that are completely for me – made with fabric that I love, patterns that I love and the end result will be mine, all mine.  A lot of the time I’m sewing custom orders, shop displays for The Fabric Mill, or working on new patterns.  I love that kind of work too, but there’s something particularly delightful about making something for myself. 

This quilt was completely selfish sewing. 

Pow Wow quilt using Florence fabrics via A Bright Corner

I got this pretty fat eighth bundle of Florence from my friend Amanda (who owns Westwood Acres.)  It didn’t sit for long before I knew what I wanted to do with it.  Pow Wow!

Florence fabric

I’ve long admired the Pow Wow quilt pattern from Allison at Cluck Cluck Sew.  However, her pattern calls for quarter-yard cuts so I had to do a bit o’ math.  Here’s what I figured out -  You can get three blocks from each fat eighth (if it is 9” x 21”) by cutting the pieces like this:


cutting layout for fat eighths for Pow Wow quilt pattern

I had 26 fat eighths in my stack so I would end up with 78 blocks.  The throw size quilt requires only 56 blocks so I was able to add another row and another column to my quilt – yeehaw! 

My finished quilt measures 61” x 73”

Florence fabric used with a Pow Wow pattern

I used Kona Ash on the backing (keepin’ it simple) and the Marcia Floral in Taupe for the binding.  (I bought the binding fabric from Fanciful Fabrics.)

Hip Hip Hooray for selfish sewing!  I looove this quilt and I look forward to many Sunday afternoon naps with it.
Pow Wow quilt pattern and Florence fabrics via A Bright Corner

The fat eighth bundle of Florence can be found here at Westwood Acres and the Pow Wow quilt pattern can be found here. 

Happy Friday everyone!  I’m linking up to Crazy Mom Quilts Finish it up Friday

Friday, October 4, 2013

Dr. Seuss Quilt

So the weather on Thursday was somewhat cooperative and I had a willing quilt-holder hanging around so I was able to get some photos of the Dr. Seuss quilt I showed you yesterday.  It’s as if all the stars were aligned or something.

Dr. Seuss quilt

The pattern is called “Wildflower Chevron Quilt” from the Adornit girls.  The applique shapes in that colorful column are supposed to be cute flowers but we didn’t think it went too well with the whole Dr. Seuss idea.  I swapped in some simple shapes and let the fabrics do the rest of the work.  Here’s a photo of the original quilt hanging at quilt market in the Adornit booth – cute, isn’t it?

Adorn it chevron quilt

The quilt shop I sewed this for needed the quilt to be just a bit narrower for display purposes so I removed the last column of chevrons and that did the trick.

For the quilting, I tried a new free motion quilting design that I found on Pinterest.  (The original pin was a bad link but I did a Google image search and finally tracked down the original source of the pin – mystery solved!)  The quilting idea came from here – and she has a lot of other great quilting ideas that I can’t wait to try. 

Quilting on a chevron quilt

I chose a green minky for the backing and a stripe for the binding.  Once my boys saw the backing they began to discuss who gets to use the quilt first.  I keep telling them it will be awhile before they see it again but it doesn’t matter.  It gives them something to argue about discuss, right?

Quilt with a minky backing

Hope you have a fantastic Friday!  I’m linking up to Crazy Mom Quilts Finish it up Friday.  Go and check out what other talented quilters have done this week.

Friday, September 13, 2013

Change of Plans


Usually when I buy a stack of fabric I have a pretty clear idea of what I’m going to do with it.  I had what I thought was a great plan to use this number print (Reunion by Sweetwater).  But when it came time to start cutting and sewing I had second thoughts. 

Reunion fabric by Sweetwater

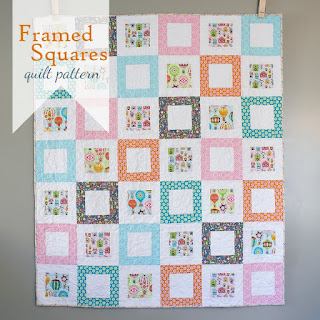
My original idea was going to be large rectangles of the number print with one 3” red circle appliqued on each rectangle.  Boring.  Instead, I decided to add these dots (Mingle from Robert Kaufman) and do simple framed squares.  I love how it keeps the number fabric as the focus, but the dot fabrics add color and whimsy. 

fun and bright throw quilt

The quilt is a nice throw size: 47” x 65”

fun and bright throw quilt by A Bright Corner

I did a solid backing in the light blue (keepin’ in simple people) and the binding is a gray print from the Ten Little Things line by Jenn Ski.  I was hoping to use more of the gray dots for the binding but didn’t have enough in my stash and didn’t have the patience to wait for an online order to arrive. 

fun and bright throw quilt by A Bright Corner

I’m calling this quilt “Run the Numbers” and it’s listed in my etsy shop.

fun and bright throw quilt by A Bright Corner

Happy Friday the 13th everyone.  Have a fun weekend and thanks for stopping by!


Tuesday, September 10, 2013

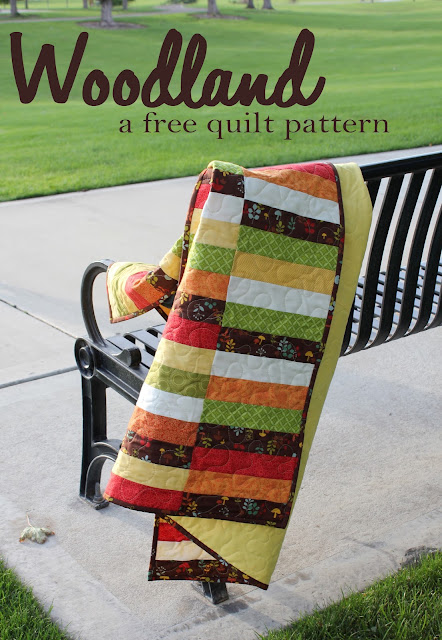
Woodland: a free quilt pattern

We had one enormous thunderstorm blow through the valley on Saturday.  It was crazy!  Neighbors, family and friends had basements flooded, trees and fences blown down and trampolines tossed around.  We were lucky though – the only damage here was that my sunflowers were leveled.  The storm brought with it the feel of fall.  Time to bring out the rich colors of Autumn.

I wrote a little about this quilt yesterday and thought I’d show you a bit more of it. 

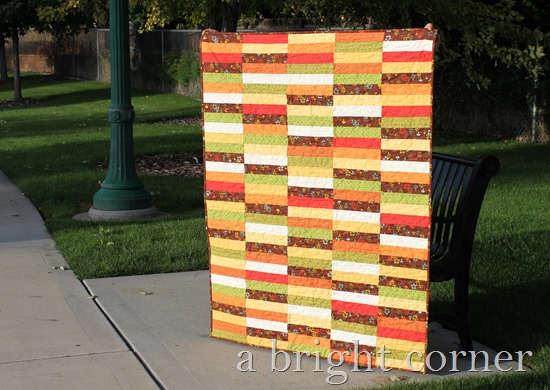
Cute fall quilt and a free quilt pattern!

The quilt is a nice lap size:  43” x 56” and was so quick to put together.  I was working with scraps and bits from my stash so I started by cutting everything into 2.25” x 9” strips.  Then I sewed them into sets of four and put them up on the design wall.  It took just a few minutes to rearrange things so I liked the distribution of colors. 

Woodland quilt and free quilt pattern

Then I sewed the strips into columns and sewed the columns together.

Usually when I’m working on a new idea I scribble everything on a piece of graph paper – measurements, math, fabric ideas, etc.  This is just the front side of my page for this quilt project.  The backside has the finished measurements and basic instructions in case I ever want to duplicate the quilt. 


scratch page

Normally I would just stick the page into a file, but with this project my finished notes were too much of a lovely mess.  I decided to type everything up in Illustrator so it was neat and tidy.  Since I’ve done the work, I might as well share, right?  You can view, download and/or print the pattern for Woodland here.  Please only use the pattern for personal use - thank you!


If you make your own version of Woodland I’d love to see it! Tag me on Instagram @abrightcorner and use the hashtags #woodlandquiltpattern and #abrightcorner so we can all see what you create!


flickr button 250 px square

Woodland: a free quilt pattern from A Bright Corner


Related Posts Plugin for WordPress, Blogger...